 Pin to Save
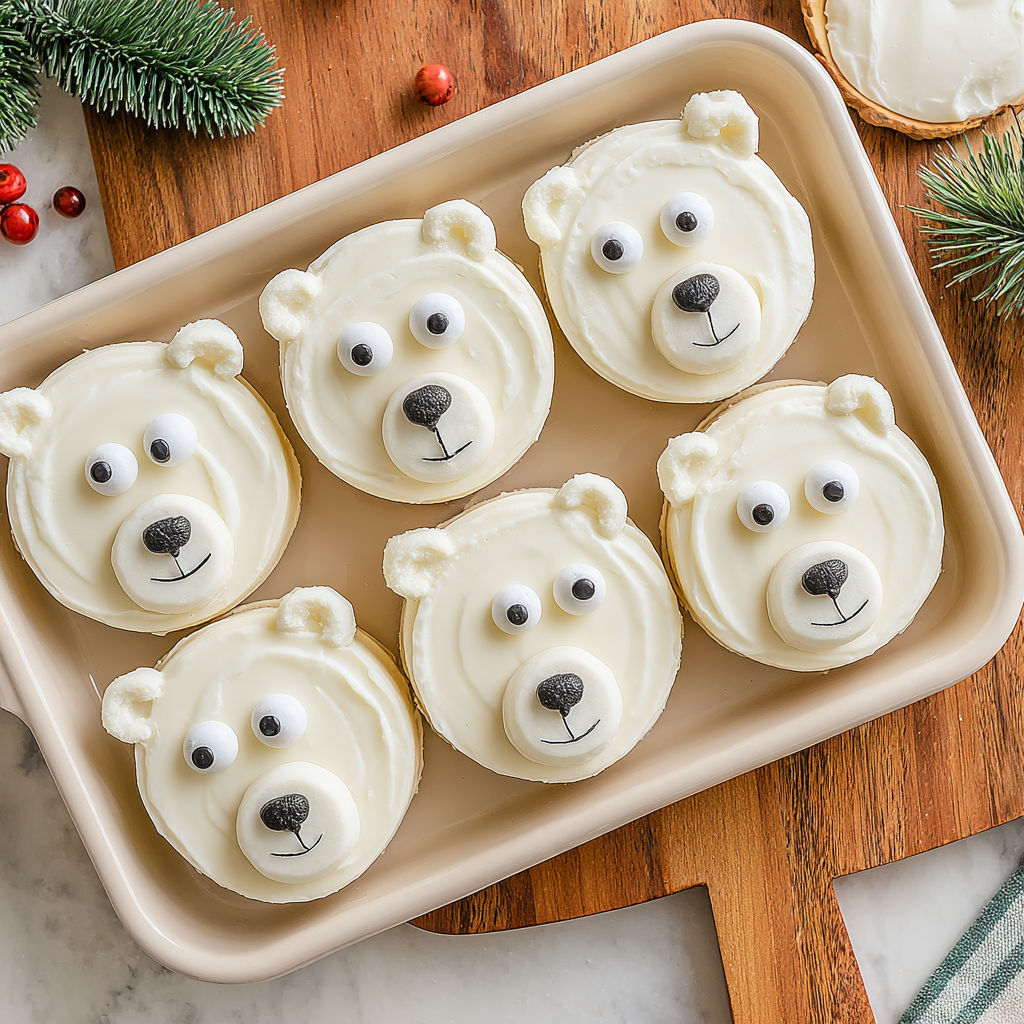
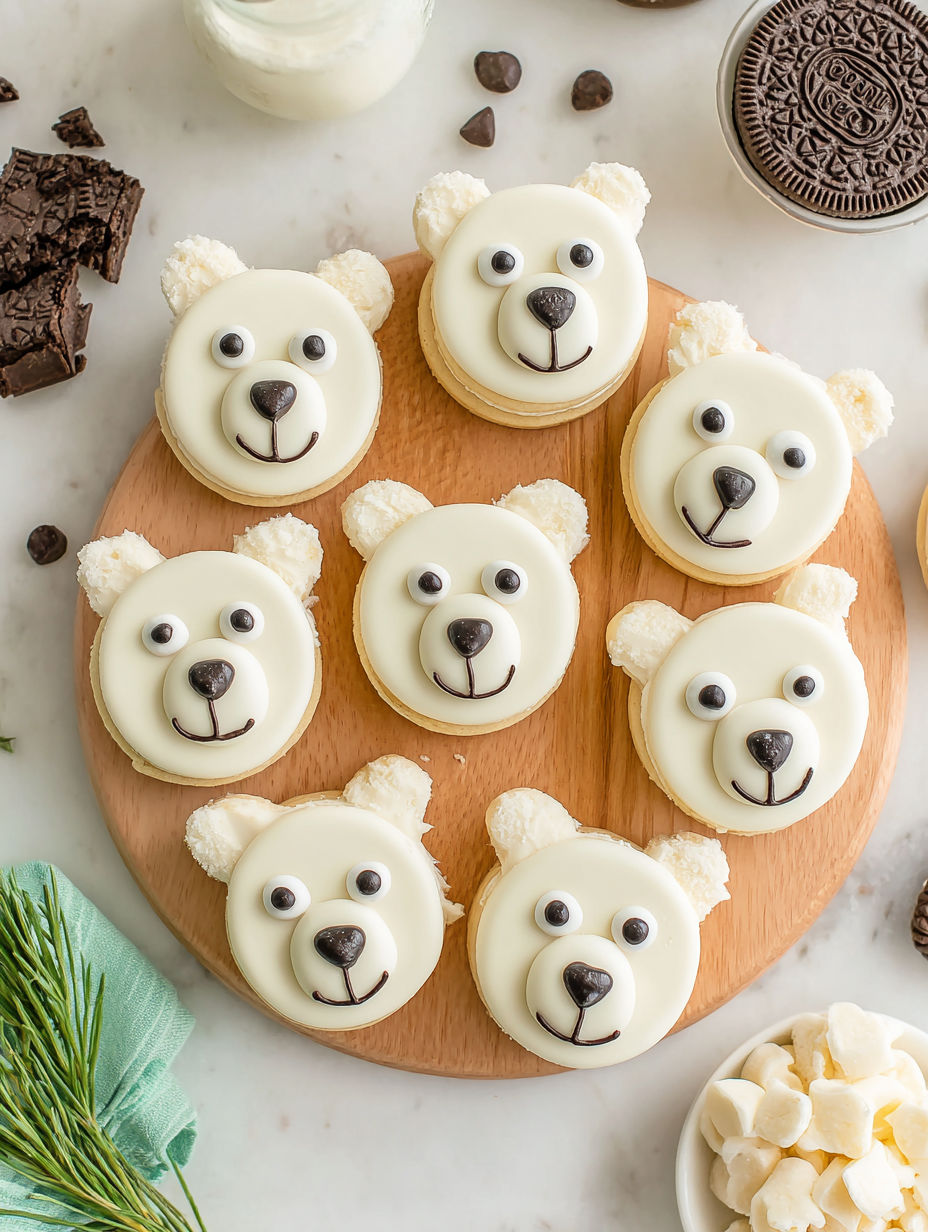
These Fun Polar Bear Oreos are delightful little treats that bring so much joy to any winter gathering. They are simple to make yet have a festive charm that makes them stand out on any holiday dessert table. Decorating them feels like a creative escape, perfect for spending quality time with kids while crafting something sweet and adorable. They have become a must make in my home every season and never fail to impress guests with their playful look and tasty crunch.
My kids and I started making these during a snow day and now they always ask to do it again whenever the weather turns cold
Ingredients
- Oreo cookies: 4.3 ounce bag or 36 cookies – the classic flavor pairs perfectly with white candy coating
- White candy melts: 2 cups or 12 ounces – easy to melt and coat, choose high quality for a smoother finish
- Candy eyeballs: 72 pieces – add personality, make sure they are wellsized for the Oreos
- Black cookie frosting: 1 tablespoon – for the nose detail, a fine tip tube works best for precision
Instructions
- Scoop the Setup:
- Line a cookie sheet or cooling rack with parchment paper. This prevents sticking and makes cleanup effortless. Set aside near your workspace.
- Prepare the Candy Melts:
- Separate the candy melts into two groups of 36. Take one group and carefully cut each candy melt in half using a sharp knife to create the ears. Set these halves aside for decorating later.
- Melt the Candy:
- Place the remaining 36 whole candy melts into a microwave safe bowl. Heat at 50 percent power for one minute, then stir gently. Repeat heating in 30 second increments at the same power, stirring well after each, until the candy is completely smooth and melted. This slow melting prevents burning and creates glossy coating.
- Dip the Oreos:
- Using a fork or candy dipper, fully coat each Oreo cookie with the melted white candy. Gently shake off the extra coating, letting it drip back into the bowl, before placing the cookie on the prepared parchment.
- Add the Polar Bear Features:
- While the candy coating is still soft, press one whole candy melt onto the lower half of each Oreo as the snout. Place two candy eyeballs just above the snout. Then position two candy melt halves on each side of the cookie to form ears.
- Allow to Set:
- Let the coated and decorated Oreos rest for about ten minutes until the coating hardens fully.
- Add the Nose Detail:
- With the black cookie frosting, carefully pipe a small nose on each snout. Using a toothpick or fine tip can help with control. Let them sit for another five minutes to ensure the frosting sets before serving.
My favorite part of this treat is definitely the icing nose detail. It adds just the right touch of character to each cookie and watching my kids delight over how much their cookies look like tiny bears is always a highlight of our holiday season.
Storage Tips
Store your decorated Oreos in an airtight container at room temperature for up to three days. They remain crisp with the candy coating intact. For longer storage, place them in a sealed container in the freezer. Thaw at room temperature before serving.
Ingredient Substitutions
If white candy melts are hard to find, you can use white chocolate chips instead. Melt gently and stir to smooth for a glossy coating. Candy eyeballs can be swapped with edible sugar pearls or small chocolate chips, but eyeballs bring the most fun effect.
Serving Suggestions
These cookies pair wonderfully with hot chocolate or milk for a cozy winter snack. Arrange them on a festive platter with other seasonal sweets to create an inviting dessert table that kids and adults love to dig into.

These Polar Bear Oreos make a festive addition to any winter spread and are a fun project to do with kids. Enjoy making them and sharing smiles at your next holiday gathering.
Common Questions About Recipes
- → What kind of Oreos work best?
Regular Oreo cookies provide the ideal size and flavor balance for coating and decorating.
- → How do I melt the candy melts without burning them?
Heat candy melts at 50% power in 30-second intervals, stirring between each, until smooth and fully melted.
- → How do I create the polar bear's ears?
Cut candy melts in half and attach them on the cookie sides while the coating is still soft to form ears.
- → Can I use other types of candy for eyes?
Candy eyeballs are recommended for realistic eyes, but small round candies can be substituted if needed.
- → How long does it take for the coating to set?
It usually takes about 10 minutes for the coating to harden, plus additional time for the frosting nose to dry.